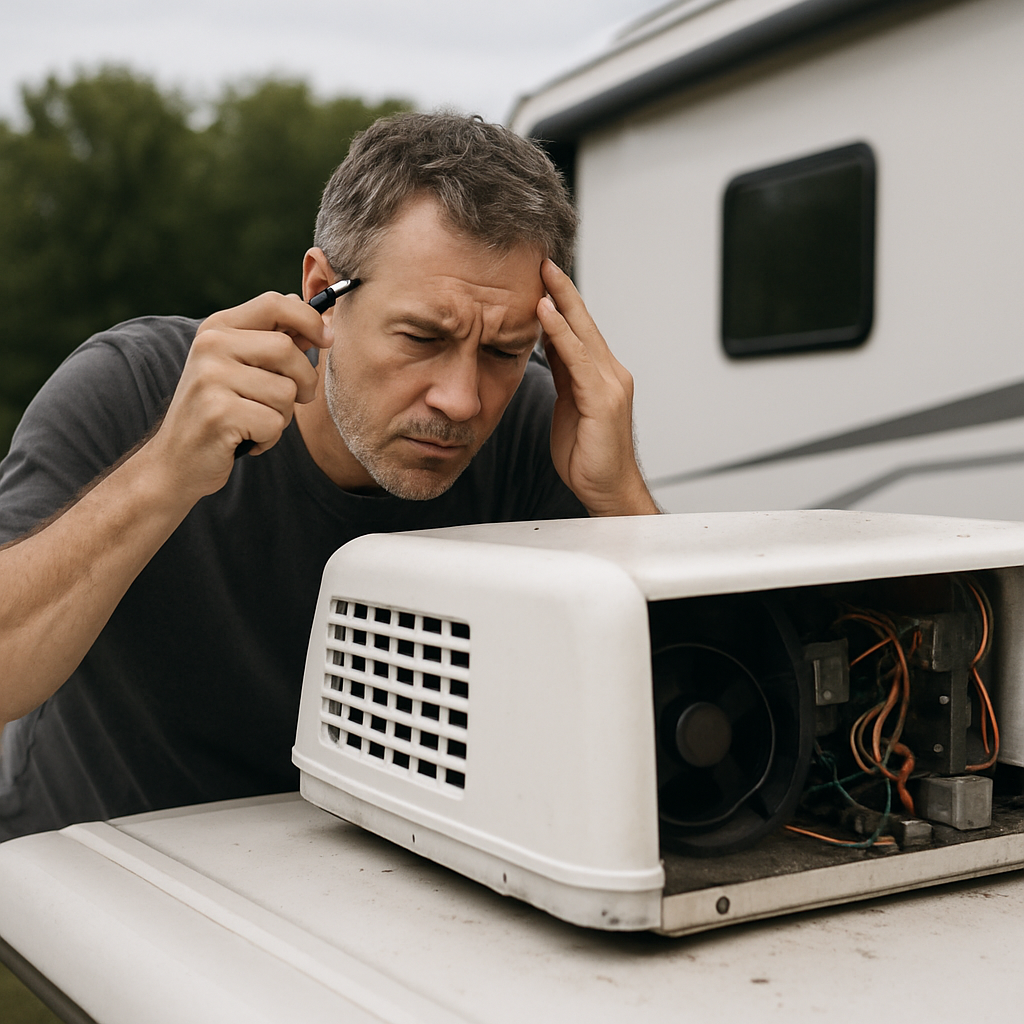
An RV air conditioner that runs but does not cool can have an airflow or icing problem, a thermostat/control or electrical fault, inadequate available power, debris restricting the outdoor heat-rejection area, a duct-distribution issue, or a compressor or other sealed-system fault. The sound of a fan, or even a noisy roof unit, does not prove that the refrigeration circuit is cooling normally. Start with the safe, accessible checks below rather than assuming the compressor has failed.
Before touching filters, covers or service areas, switch the air conditioner off and isolate its power supply as directed by the RV and appliance documentation. Avoid roof work in wet, windy or otherwise unsafe conditions. Do not bypass a fuse or breaker, bridge terminals, open the refrigerant system or attempt a refrigerant recharge.
RV Air Conditioner Not Cooling? Start With These Checks
Use this order to separate simple operating or airflow issues from faults that need diagnosis. It also prevents a reset from becoming a substitute for finding the underlying problem.
- Confirm the controls. Select cooling mode, set a temperature that calls for cooling, and check that the thermostat responds when its setting is changed. A thermostat or control issue is one possible reason cooling does not start or does not continue as expected.
- Decide whether airflow is weak or normal but warm. Weak airflow points the next check toward the return-air path, filter, icing or air distribution. Normal-volume air that remains warm has a wider set of possibilities, including controls, power, capacitor, compressor and sealed-system concerns.
- Inspect accessible filters and return-air paths. Check for a visibly loaded filter, loose material or obvious blockage, and clean only as the unit manual permits. Broad RV troubleshooting guidance identifies icing, electrical problems and capacitor concerns among the possible causes of warm air, while also stressing basic checks first.
- Look for signs of icing. If accessible areas show frost or ice, or airflow has progressively fallen away during operation, turn the system off and let it thaw. Do not use a universal thawing time; conditions and unit designs differ.
- Consider the power situation without live testing. Verify that the RV has the intended supply available and that other heavy loads are not creating an obvious power-demand problem. Check the relevant breaker or fuse status only according to the RV and appliance documentation. A tripped breaker, blown fuse, insufficient supply power, loose or corroded connection, or control fault can all contribute, but none can be confirmed from cabin-air temperature alone.
- Inspect accessible visible debris. With power isolated, check permitted exterior or roof-unit areas for obvious leaves, dirt or other debris. Follow the manual for any cleaning method and roof-cover removal.
- Use the exact model manual before resetting or going further. The roof-unit model and thermostat model both matter. Their documentation is the authority for reset steps, fault indications and allowed owner maintenance.
| What you notice | What it can suggest | Appropriate first action |
|---|---|---|
| Airflow is barely blowing | Restricted filter/return path, icing, a fan or air-distribution issue | Inspect accessible filters and return paths; switch off if icing is suspected |
| Airflow is normal but warm | Control, power, capacitor, compressor or sealed-system issue; outdoor restriction is also possible | Confirm cooling mode and setpoint, then follow model-specific power and reset guidance |
| Cooling fades and airflow declines | Icing can be involved, often alongside an airflow restriction | Turn the unit off and investigate accessible airflow restrictions after it has thawed |
| Breaker trips again or a fuse blows again | An electrical or equipment fault needs diagnosis | Do not repeatedly reset or bypass protection; arrange qualified service |
| Cool air seems weak only at distant ducts | Duct leakage or poor supply/return separation in a ducted RV | Inspect accessible registers, joints and visible seals as documentation allows |
Heat, direct sun, RV size, insulation, occupancy and the unit’s capacity can all affect how comfortable the cabin feels. Those factors can make a functioning roof unit feel inadequate on a very hot day. They do not, however, justify using a generic temperature-drop figure as a pass/fail test. Check the exact unit manual or ask an RV HVAC technician for a model-specific performance assessment.
If Airflow Is Weak or the Unit Ices Up, Check Airflow First
“Barely blowing” and “blowing normally but not cold” are different symptoms. When airflow is weak, cooled air cannot be delivered effectively through the cabin. Restricted airflow can also contribute to an icing condition; once ice forms, the unit may deliver little useful cool air. RV-focused troubleshooting material likewise identifies icing as a possible reason an air conditioner stops producing cool air.
Check the accessible return side
Turn the system off and inspect the return-air filter and nearby accessible air path. Remove visible debris and clean or replace the filter only in the manner specified for the model. Do not force tools into the unit or remove covers that the manufacturer does not identify as owner-serviceable. A filter issue is plausible when airflow is poor, but it does not prove that the filter is the only fault.
If you see frost or suspect a frozen coil
Stop cooling operation and allow the unit to thaw before restarting it. Continuing to run an iced unit is unlikely to restore normal airflow or cooling. Once thawed, revisit the accessible filter and return-air path, then use the manual to determine whether there are model-specific checks. Repeated icing after basic airflow maintenance is a reason to book RV HVAC service, because airflow, controls and refrigeration-system issues can overlap.
Check outdoor debris cautiously
Debris around accessible exterior fins or the outdoor heat-rejection area can impair cooling. If the manual permits cleaning, isolate power first and use the stated method. Avoid bending fins, soaking electrical components or working on the roof when access is unsafe. A discussion of RV AC faults from The Camping Advisor also lists dirt/blockage, icing, power limitations and electrical components as possible contributors; treat that list as a starting point for diagnosis, not proof of a particular failure.
How to Reset an RV Air Conditioner Without Guessing
There is no verified universal RV air-conditioner reset-button location or reset sequence. The correct procedure depends on the installed roof unit and, in many RVs, the thermostat or control system as well. Identify both model numbers and follow their owner manuals. Do not apply household-AC reset advice to an RV roof unit simply because the systems appear similar.
A reset can be a reasonable model-directed troubleshooting step after confirming the cooling setting, thermostat response and basic power status. It cannot repair a blocked filter, an iced coil, debris-restricted heat rejection, a duct leak, inadequate supply power, a loose connection, a failed capacitor, a failed compressor or a sealed-system problem.
Low-risk checks before a manual-directed reset
- Confirm that cooling mode is selected and the setpoint is calling for cooling.
- Check whether the thermostat display and controls respond normally.
- Consult the RV and appliance documentation for the relevant AC breaker or fuse and for any stated reset process.
- With power safely isolated, inspect only the condition of obvious, accessible connections where the documentation permits. Damage, corrosion or a loose connection should be assessed by a qualified technician rather than manipulated under power.
Guidance specific to Coleman Mach units notes that reset instructions and reset-button availability should be confirmed in the applicable manual, and that diagnosis can extend to the thermostat, fuses, wiring and capacitors. That is precisely why a generic reset sequence is not a reliable repair method. See the Coleman Mach troubleshooting overview for the model-specific-manual emphasis, but rely on documentation for your exact equipment.
For Ducted RVs, Check Whether Cool Air Is Escaping Before It Reaches the Cabin
This section applies to ducted installations only. A roof unit may be producing cooled air while a gap, displaced material or poor separation between the supply and return paths reduces what reaches the living area. That can make the RV feel as though the air conditioner is not cooling even when the problem is partly air distribution.
With power off, inspect accessible ceiling registers, visible duct joints and visible seals for obvious gaps or displaced material, following the RV and unit documentation. Do not disturb the roof gasket or sealed refrigeration components. If a documented, accessible duct leak is found, an appropriate HVAC foil tape or sealing material may help; it is not a universal cure for a no-cooling complaint, and ordinary household duct tape is not a technical recommendation.
An owner example from Horsepower Hub’s ducted-RV cooling discussion illustrates how supply/return sealing can affect cabin delivery. It should not be read as evidence that every RV with warm air has a duct leak. Non-ducted RV air conditioners have a different air-delivery arrangement, so this branch does not apply in the same way.
How to Tell Whether the RV AC Compressor May Be the Problem
Warm air or no cooling can be consistent with compressor trouble, but it does not prove that the compressor is bad. The same complaint can result from restricted airflow and icing, thermostat or control faults, a fuse, power or connection problem, a capacitor issue, or another sealed-system or refrigerant-related fault.
A running fan does not establish that the compressor is operating correctly, and an unfamiliar sound does not identify which component has failed. Proper compressor diagnosis may require model-specific electrical and refrigeration-system testing by a qualified RV HVAC technician. Do not condemn the compressor from outlet temperature, sound, a web-based amp figure or a single symptom description.
In particular, do not carry out live-voltage testing, capacitor testing, terminal bridging or refrigerant work based on a generic guide. Many roof air conditioners use sealed refrigeration systems. Any suspected compressor or refrigerant-system fault belongs with suitably qualified service. Replacement may ultimately be the sensible outcome in some cases, but it should follow diagnosis rather than assumption; not every RV AC fault requires a complete new unit.
Power, Controls and Electrical Faults: What an Owner Can and Cannot Conclude
Basic controls and protection devices are worth checking because a blown fuse or tripped breaker, insufficient available power, a thermostat fault, a poor connection or a capacitor fault are all possible contributors to a unit that is not cooling. They are alternatives to one another, not a diagnosis from the symptom alone.
At owner level, stay with documented control checks, the specified breaker/fuse status and visible-condition inspection with power isolated. Repeated breaker trips or blown fuses, heat damage, corroded or damaged wiring, abnormal fan or compressor operation, or uncertainty about the RV’s supply all call for professional assessment. Never repeatedly reset a breaker or replace/bypass protection with a different rating in an effort to keep the AC running.
There is no useful universal compressor amp target, voltage threshold or capacitor value for this article. Those readings vary by equipment model and operating conditions, and the supplied research does not provide a validated, safe interpretation procedure. A technician can use the correct model specifications and test process instead of applying forum figures to the wrong unit.
When to Call an RV HVAC Technician
Arrange qualified RV HVAC diagnosis rather than continuing owner troubleshooting when any of the following applies:
- Icing returns after accessible filter and airflow checks.
- A breaker trips repeatedly or a fuse blows repeatedly.
- The fan or suspected compressor does not operate normally, or operation is intermittent.
- Accessible wiring or connections look burnt, damaged or corroded.
- Safe cleaning and control checks do not restore normal airflow and cooling.
- You suspect a capacitor, compressor, refrigerant leak or any other sealed-system fault.
- Roof access or cover removal cannot be done safely.
Give the technician the roof-unit and thermostat model numbers, a clear description of whether airflow was weak or normal-but-warm, whether icing occurred, what the power source was, and which safe checks have already been completed. That information helps avoid replacing parts based solely on a broad “RV air conditioner not cooling” symptom.
Practical Bottom Line
Begin with the controls, accessible filter and return-air path, signs of ice and any permitted visible-debris inspection. Use a reset only if the exact model documentation calls for one. For ducted RVs, add accessible duct and seal checks. If cooling remains poor, protection devices trip, icing repeats or compressor/sealed-system trouble is suspected, stop at the owner-maintenance boundary and use an RV HVAC technician. That approach addresses the common, low-risk possibilities without mistaking a symptom for a confirmed compressor or refrigerant-system failure.